Blog Stone Maintenance Tips & Information
Rusted Rod Repair
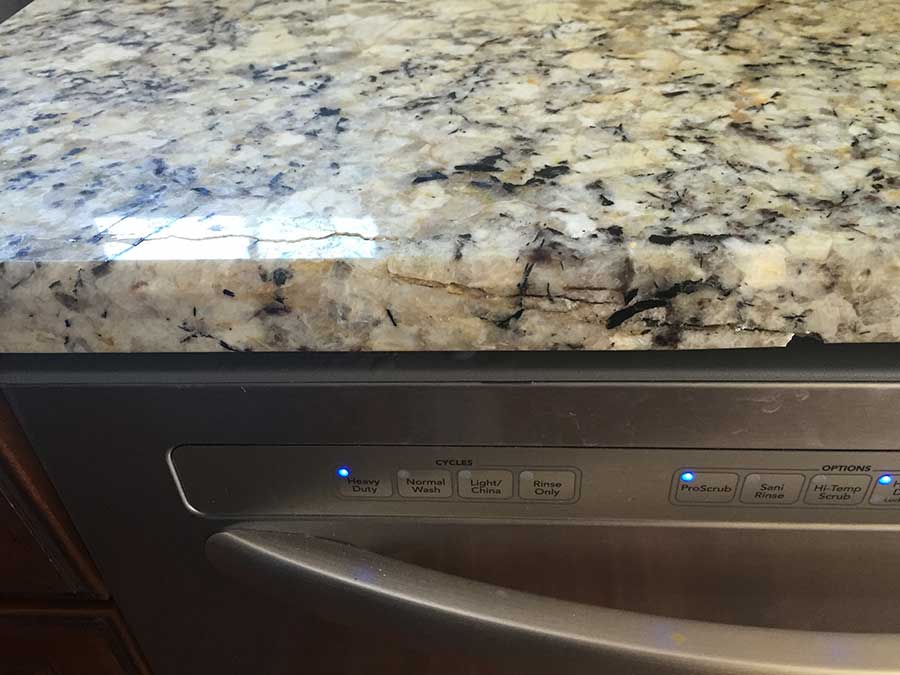
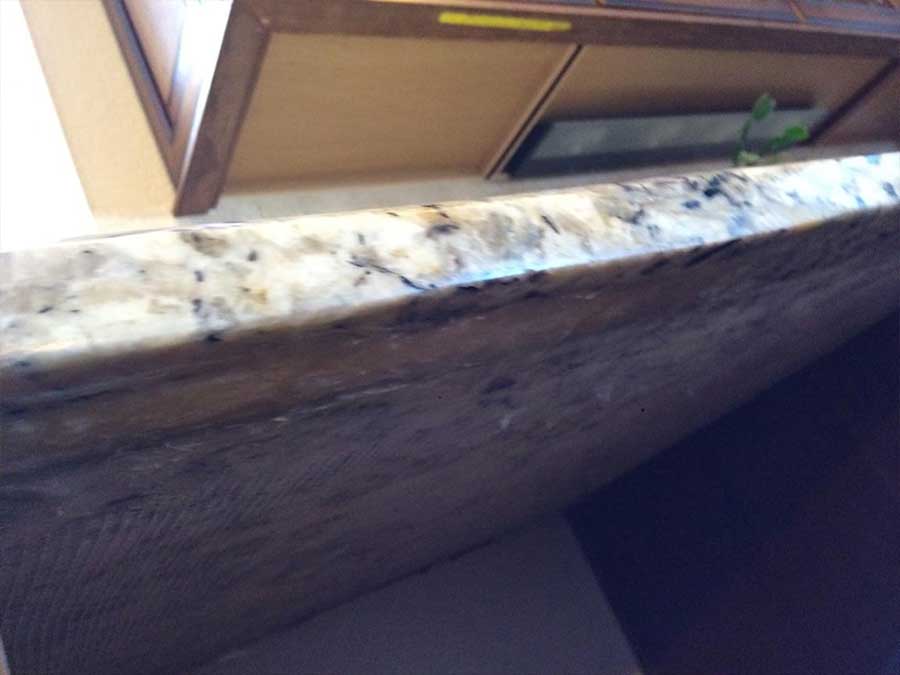
The weakest part of any granite countertop installation is the area of the granite right in front of the sink. Typically this area is only 3″ wide from front to back. To strengthen this piece many installers will cut a channel in the underside of the granite and install a steel rod for support. Though this adds support the steel rod can pose a problem down the line. If the adhesive used to secure the rod fails is starts to rust. When this happens the expansion and contraction of the metal causes a fracture in the granite. The first picture in this post is what that type of fracture can look like.
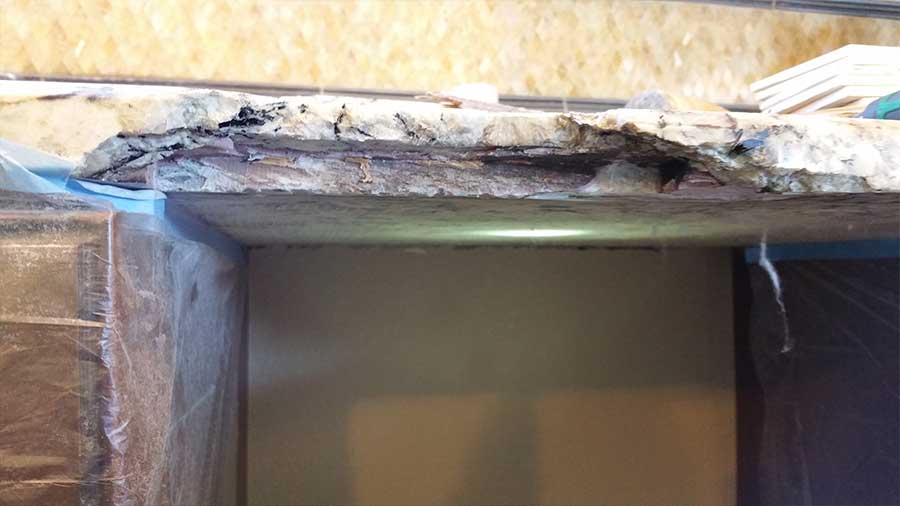
You wind up with a crack in the granite running parallel to the front edge and against the “grain” or natural pattern in the stone. When reviewing this with the customer that’s exactly what I thought this was. Rather than being in front of the sink as usual this was directly above the dishwasher. At the top of the door to the dishwasher directly beneath the break in the top was the exhaust vent. As the dishwasher ran through its cycle hot steam came out of the dishwasher and directly onto the bottom of the granite. When I looked beneath the granite I discovered that an anchoring mechanism for the dishwasher had been installed in the bottom of the stone. This mechanism was them glued in with a resin adhesive. The adhesive had failed and whatever the support screws were attached to was rusting and causing the granite to break.
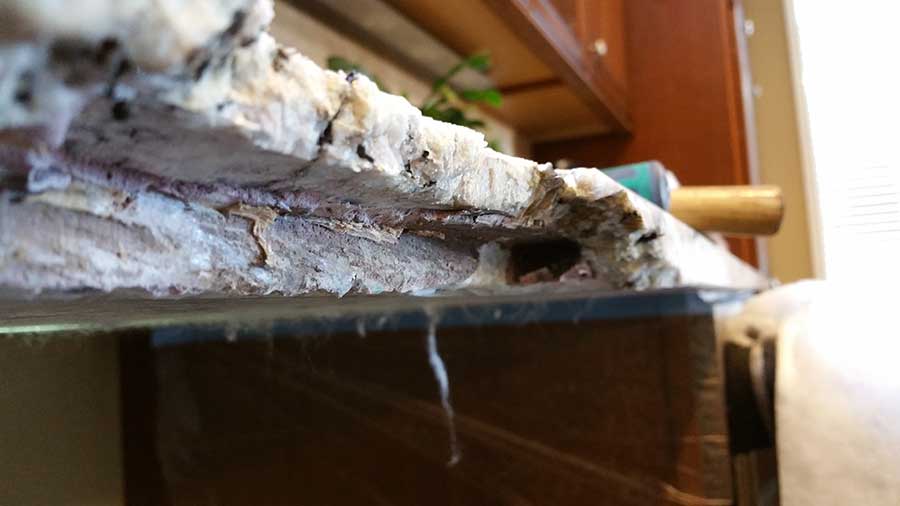
I had the homeowner pull the dishwasher out so it would be easier to work in this area. I then went about cutting away the old adhesive. Once this was done I found something I didn’t expect. An 8″ long, 2″ wide piece of wood glued into the granite.
What was happening here was that when the steam exhaust left the vent on the door of the dishwasher is was going up through the screw hole used to anchor the machine. What happens when wood gets wet? Over time this wood was expanding causing stress on the granite and the crack seen in the first picture.
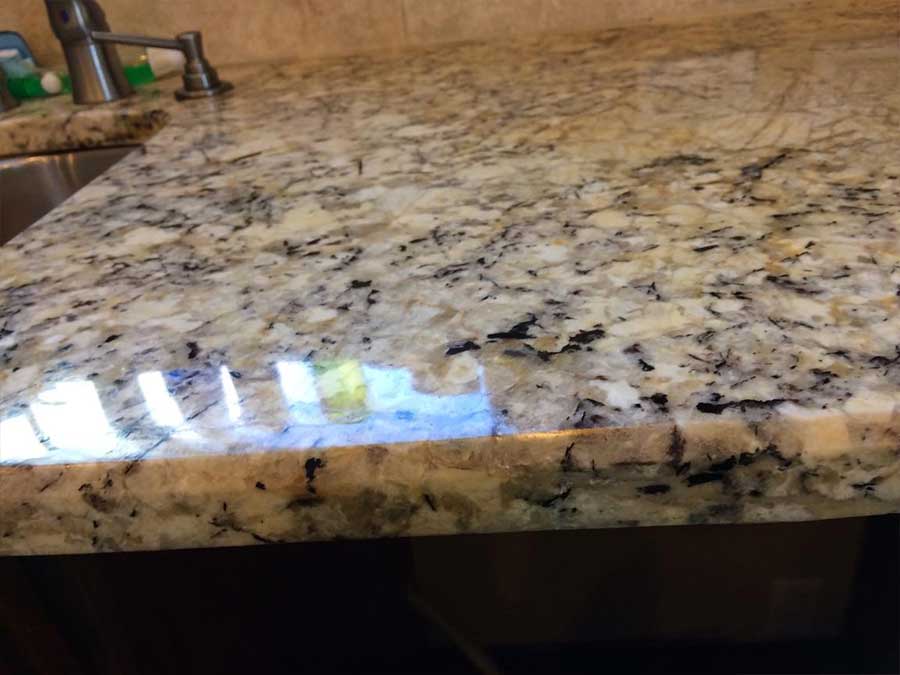
Do complete the repair properly we had to remove all pieces of the wood. Once we had all the pieces of the wood chipped out we glued the broken piece back on then filled the gap on the bottom of the stone with adhesive. Once this was done we fill the surface pits of the break then ground the repair flat. We then re-polished the affected area and unless you know what happened you can’t even tell a repair was done.
By Josh Huseby 8-8-2016
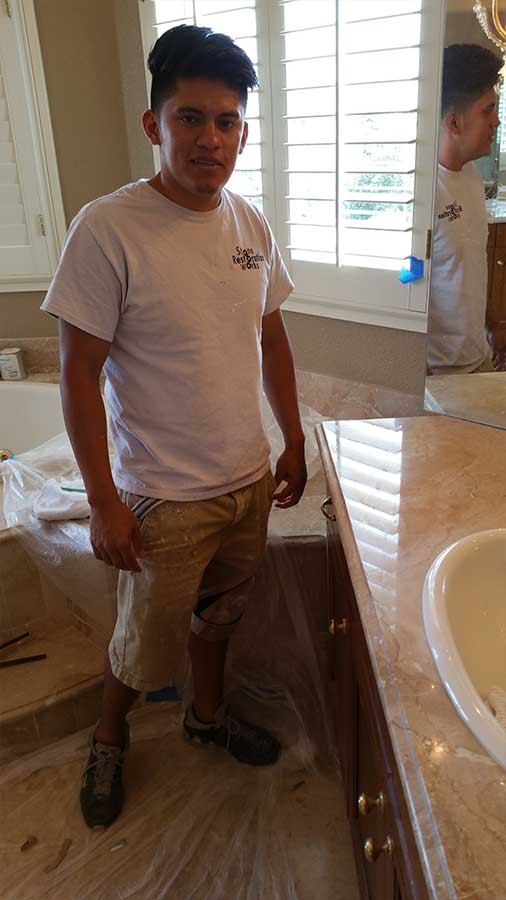
Repair by Miguel
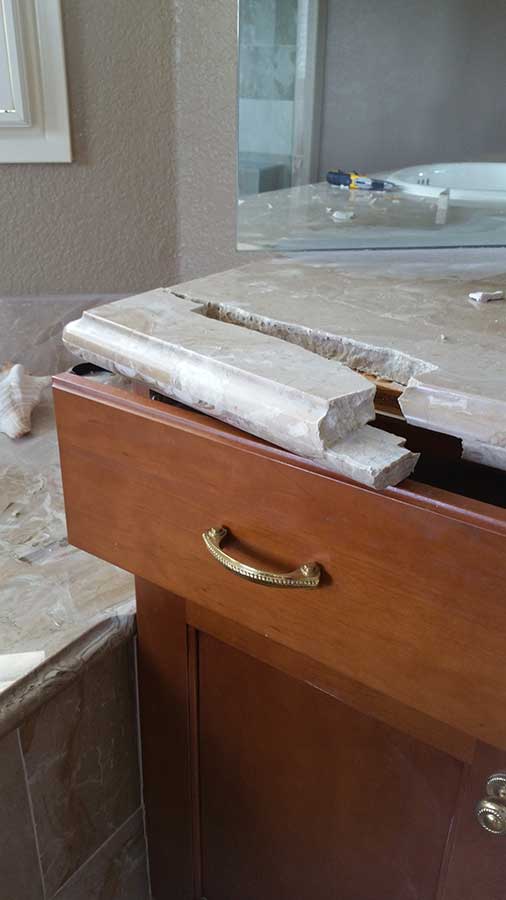
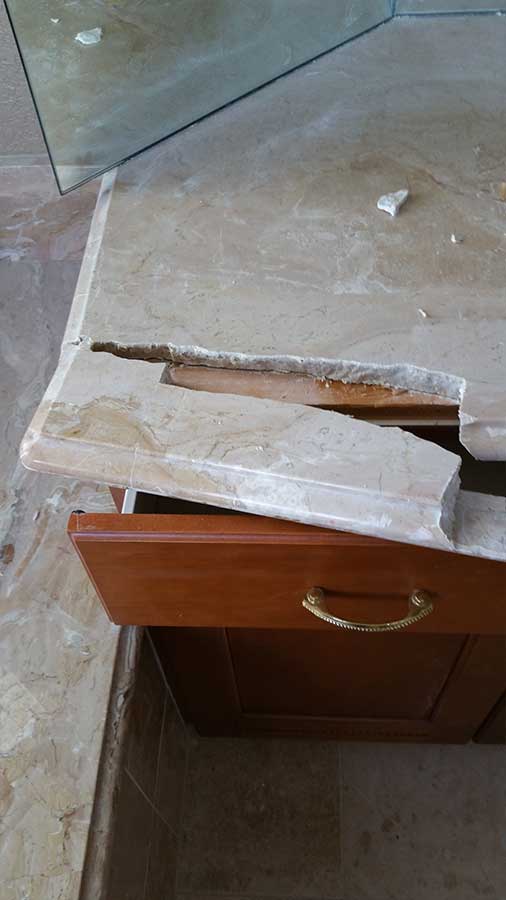
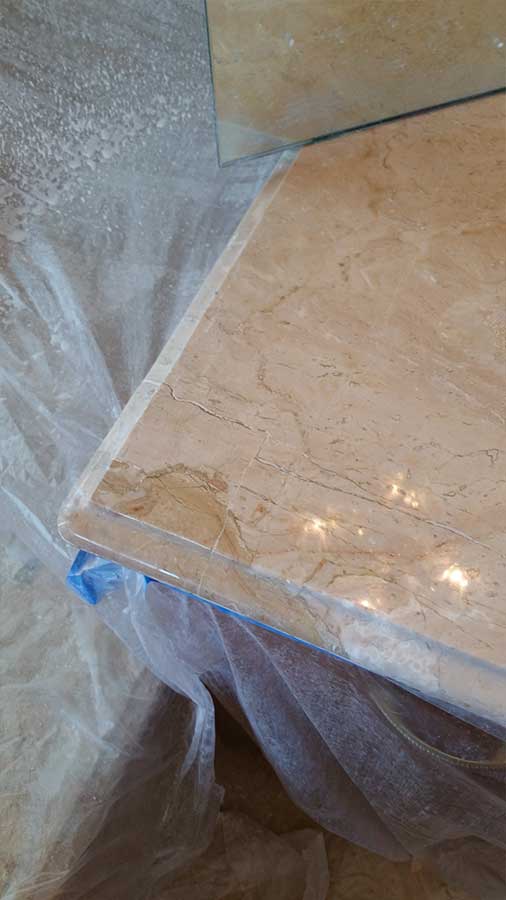
This is a recent repair completed by our Master Technician Miguel to a marble counter at a home in Broomfield. This countertop was damaged when a contractor stood on the counter to fix some vanity lights. Initial inspection of the break revealed that a repair was attempted. Unfortunately it was repaired with liquid nails and caulking. Our technician removed the broken piece completely then used a structural grade adhesive to glue it back together. Once it was secured the surface of the crack was filled then the entire repair was refinished and the affected area was polished to blend in with the rest of the counter.
By Josh Huseby 8-5-2016

Introducing Captain Marble

Helen Marmol lived and worked in museums. She specialized in the cleaning and restoration of historic stone artifacts. From Neolithic stone tools and stone sarcophagi of ancient cultures to Renaissance sculptures. She was the world’s preeminent stone art historian. She was happy. Content in her anonymity working in basements readying histories carved in stone for public consumption.
Until one fateful night, her work on an ancient stone figure transformed her into something more.
The piece was not unusual because of where it came from. She worked on thousands of pieces from ancient cultures uncovered in the mountains of South America. Many of which looked exactly like the smooth green blue polished head of this ancient idol.
What made this one unique was that unlike the rest it was not made of local stone. It didn’t share the grey speckled appearance of idols carved from local stone. It shimmered grey-blue in the artificial light of her lab. The figurehead seemed to both transmit and shield light simultaneously.
As with all her pieces, she started by cleaning it and preparing it for final detailing when she noticed an anomaly in its left eye. The right eye was smooth and round with no pupil carved in its center. The left had a square depression inside a perfect circle carved in its center.
Staring at the carved pupil she couldn’t shake the feeling that it was more than just a detail carved in the blue-green stone of the rock. She grabbed the small flat screwdriver she kept on her workbench gently slid it into the small depression of the pupil and turned it like a screw.
A light green light exploded from the piece and imbued Helen with the ability to manipulate stone. Since that time she has used her powers to bring natural stone back from the brink of abandonment as Captain Marble!
By Josh Huseby 8-5-2016
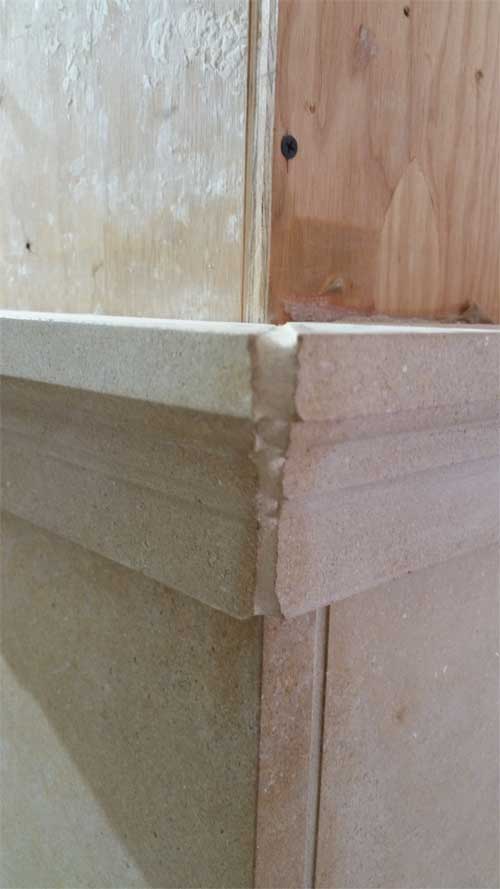
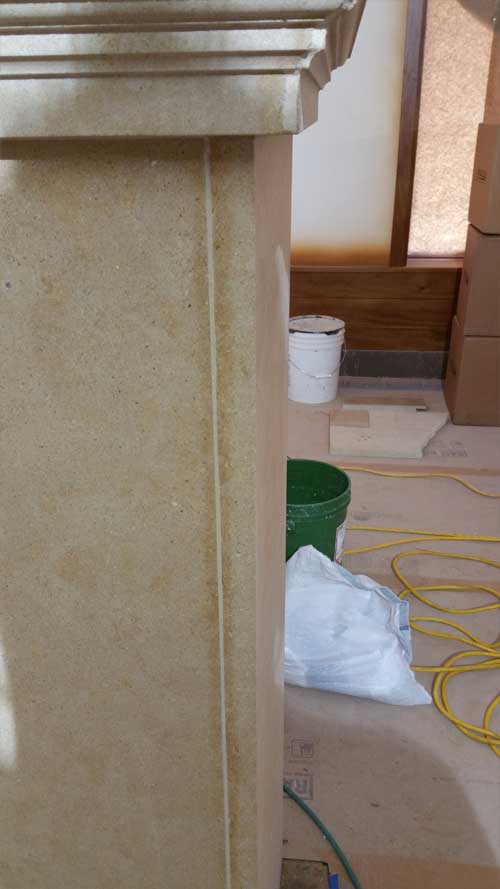
Historical Furniture Restoration

This is one of the coolest restoration projects I have undertaken. It is not the most complicated I have had to piece together stone tops as if they are puzzles in the past. It does, however, have the best story. Together this armoire and the piece of stone that now sits on top of it in one piece make up an antique that is more than 100 years old.
Our customer inherited this from her mother, who inherited it from hers, who brought it with her when the young family immigrated from Germany early in the last century. The stone was with the piece when it was originally purchased in Germany and it stayed with it in the cargo hold of a ship across the Atlantic ocean. The family and thearmoire made the trip in one piece but unfortunately the stone top did not. When the family’s furniture was disembarked the stone was in pieces and, according to our customer, it has been for 100 years until she, original owners Grand-daughter, called us to fix it.
We started by gluing the three pieces together. Once the glue set we cut slots in the stone perpendicular to the crack then inserted fiberglass support rodding into the slot. We then filled the spaces with a structural adhesive which is also pictured. Once that set we flipped the top right side up, filled surface pits then refinished and polished the piece. Once complete we reset it back in its place as one piece for the first time in 100 years.
By Josh Huseby 8-5-2016
Project Profile - Travertine


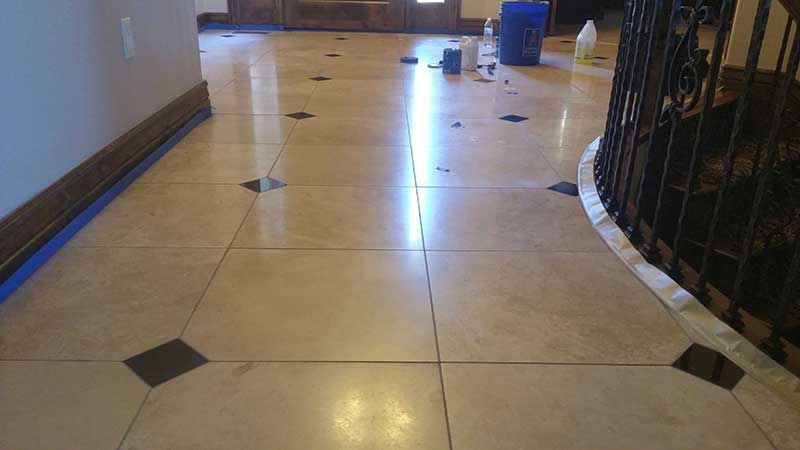
This project is one we completed in January of 2015 in Castle Pines. This project was very unique. There were three main areas that we had to address 1) the main entry 2) the kitchen and 3) the master bathroom.
The reason we were called by the homeowner in the first place is because a previous contractor (who was not a stone specialist) had applied a sealer to the floor promising a simple cheap fix to a dull floor. Now as the readers all of my customers know just sealing the floor cannot improve the appearance of a dull and worn floor. Regardless of the sealer and application method there is always multiple steps in preparation for sealer application. This contractor applied a sealer improperly and left a streaky blotchy appearance across the entire floor.


The first step was to remove all excess sealer. We do so using an abrasive honing powder instead of a harsh chemical stripping agent. This leaves the floor perfectly honed and ready for further diamond refinishing. And since we avoid using a chemical stripping agent the risk to the finish of surrounding surfaces, base boards wood floors etc, is minimal.
Once the old sealer is removed and the floor is honed we progress through our diamond refinishing process which leaves the floor with a satin finish in preparation for final polish. For this job we used a soft white pad and a acid polish compound that created the high gloss shine seen in the after pictures.


By Josh Huseby 8-5-2016
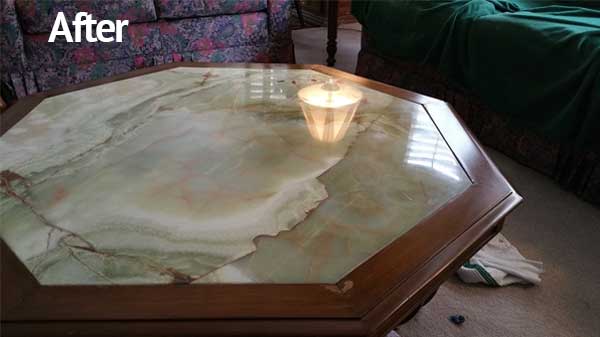
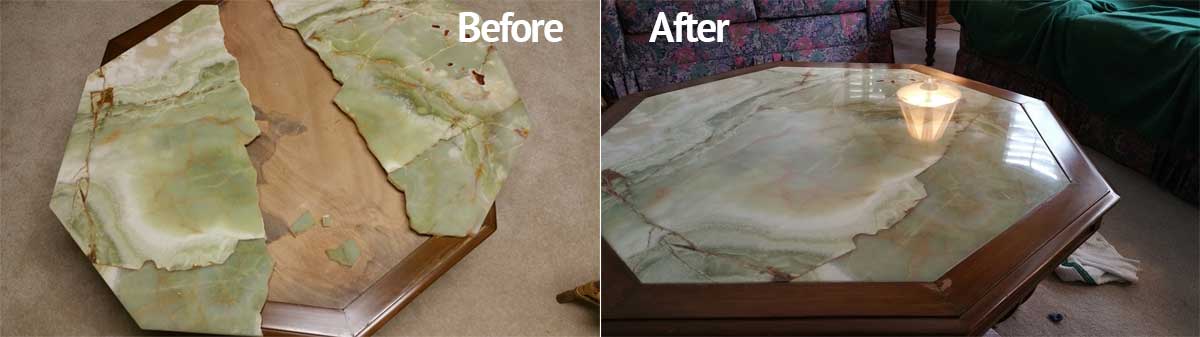
Project Profile Onyx Table Repair

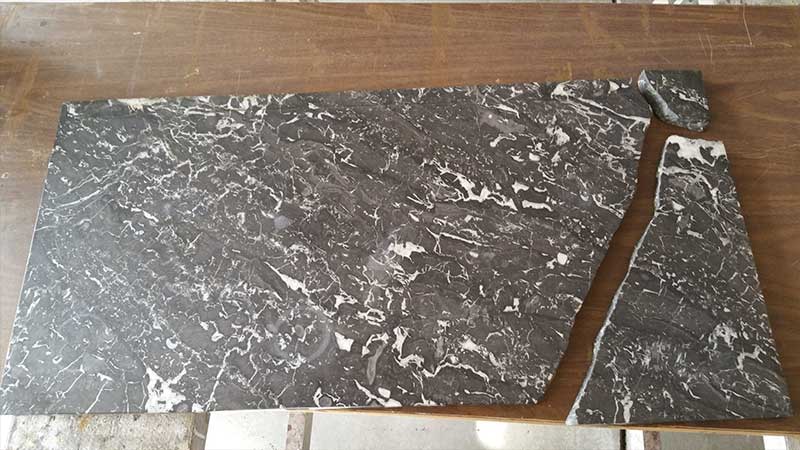
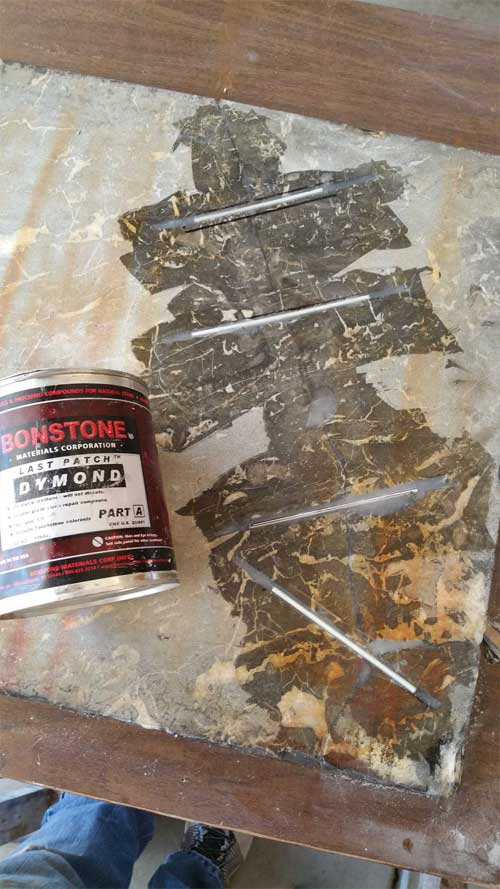
The photos attached were for an interesting project. The owner of the table pictured purchased it more than 40 years ago in another county. The table was broken by her moving company and since it was such a unique piece, we were called to repair it.
It is difficult to tell from the picture but each side of the octagon is not the same length so when the repair was completed placing it back in the inset was a challenge.
 The first step was to remove the broken pieces from the table inset. We then set up a work station in her garage. We separated all the large pieces then dry fit them in place. Once we had them dry fit we pulled them back apart. We then had to glue the pieces back together. For this project we used two adhesives both from Bonstone Materials Corp. The first was their Fast Set Extreme Epoxy. We applied a bead of the adhesive along thecenter of the break along each side. We then slid thelarge pieces togetherthen applied adhesive to the smaller pieces and set them in place. Once the pieces were loosely fit together we used large C-Clamp to squeeze the broken pieces together tightly. Once this was done we usedDymond, a two part structural patching adhesive, to fill the surface pits and voids along the break.
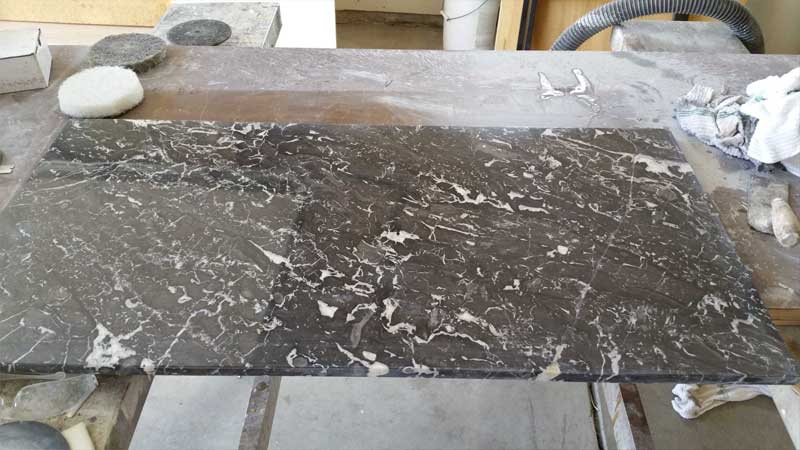
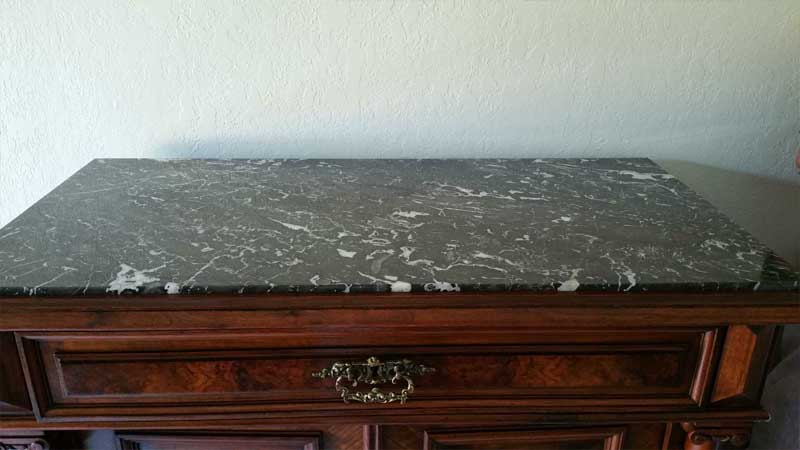
The adhesive takes about an hour to fully cure and once it had we sanded the entire crack to remove the excess adhesive. From this point we diamond refinished the entire piece removing all etches, scratches and other blemishes then repolished and sealed the entire piece. Start to finish the project took about 5 hours and the customer was left with a completely restored table top.
By Josh Huseby 8-5-2016
Care Tip for February 2015
Care Tip for February
Cleaning: Throw the mop out with the bath water
There are any number of common questions that we answer for our customers both during the initial evaluation, during and after the project. The one that may be the most important is:
How do I keep it (the floor, the grout, the counter etc.) looking great after you are done?
The answer to that question is simple:
-
- Get rid of your mop. Wet mopping your floor is like bathing in a tub after your entire family has used it without refreshing the water. In the end you are “cleaning” yourself with dirty water. The same goes for your floor. Grout is a low spot on the floor and a natural collection point for soil. When you wet mop you are simply pushing soil across the floor and into your grout joints causing discoloration and staining. Soil is also mildly acidic so it will gradually degrade the finish of your natural stone by slowly and consistently etching the surface.
- Adopt a cleaning technique that pulls dirt off the surface. Dust mops with microfiber applicators are great for this. The microfiber attracts soil lifting it off the surface. Be prepared to use multiple applicators since using one applicator across the whole floor will similarly spread soiling rather than lifting it. For daily cleaning a dust mop can be used dry to remove dust and light soils. When heavy cleaning spray a stone safe cleaner directly on the surface then use the micro fiber mop to clean the surface one section at a time.
- This technique can be used on countertops as well using a microfiber towel instead of the mop.
- For showers spray the surface directly with the cleaner then use a microfiber towel to spread the cleaner across the surface until there is no more cleaning residue.
- Another important tool to utilize to keep your shower clean is a squeegee. Use a squeegee after each use to remove water from the surface of the tile.
- Use a stone safe cleaner. A stone safe cleaning is one that is close to neutral on the PH scale meaning it has a ph of 7. A cleaner that is that is too acidic will damage the finish on marble travertine and limestone and will contribute to grout degradation. We leave a care kit with all of our customers and the stone cleaner that is included is the best we have used. It is fortified with hydrogen peroxide and works wonders as a multi surface cleaner.
As always we are interested in what you think about Stone Restoration Works so please, don’t hesitate to share your feedback with us.
By Josh Huseby 8-5-2016